
T-shirt printing is a good hobby and a rewarding one. I remember when i was in college, i sell t-shirt that my brother made. The price is around 250 per shirt and the cost to produce is around 110-150 pesos. Not bad isn’t it. So, below is a simple tutorial about this. For sure, this would be a trial and error type of business but once you master it, money will surely come.
Silkscreen printing
Things needed:
Silkscreen with frame.
Acetate
Pentel pen
Photo emulsion
Paintbrush
Mixing bowl / cup
Squeegee applicator / rubber applicator
Textile Paint
T-shirt
Plywood / hard flat plastic/Formica
Creative hands
Glass as big as the frame (optional)
Pressurized water source
Steps:
- Think of a design. For starters, start with one color design. You could try the “worst president logo”. It is difficult to copy it by hand so better use a computer. Print it in an acetate. Because of the advent of computers using stencils is now a bit outdated.
- Clean the surface of the silkscreen. Be sure there is no dust, particles etc.
- Then get the photo emulsion. Usually it has two components. The pink liquid part and a white crystalline part or a clear liquid. Just mixed a minimal amount in the mixing bowl or cup. Enough to cover the whole silkscreen.(see instruction of manufacturer before using it, just to be sure.)
- Place the silkscreen vertically, slightly inclined, and the flat surface facing you.
- Now, use the paintbrush to apply thin layer of the photo emulsion to the screen. Apply it from the top going down. Be sure that all areas are covered and there is no bubbles or excess photo emulsion that is dripping. Do this also in the inner portion of the silkscreen.
- Upon doing so, place the silkscreen on a dark room or dark closet for at least 2-3 hours.
- Afterwards, place the acetate on the flat surface of the silkscreen and cover it will the glass. The acetate will be sandwich between the glass and the silkscreen. Then put it under the sun. Some uses a halogen lamp. They place it under the halogen lamp to dry. Exposure time would be from around 10-15 seconds using a halogen lamp. If under the sun it would depend on the intensity of the sun. In short, it would be a trial and error process.
- After sun drying / bulb drying, you need to remove the excess photo emulsion from the silkscreen. Use a pressurized water source to remove it. Spray into the silkscreen. You will see the image of the acetate is now in your silkscreen.
- Clean it thoroughly and let it dry.
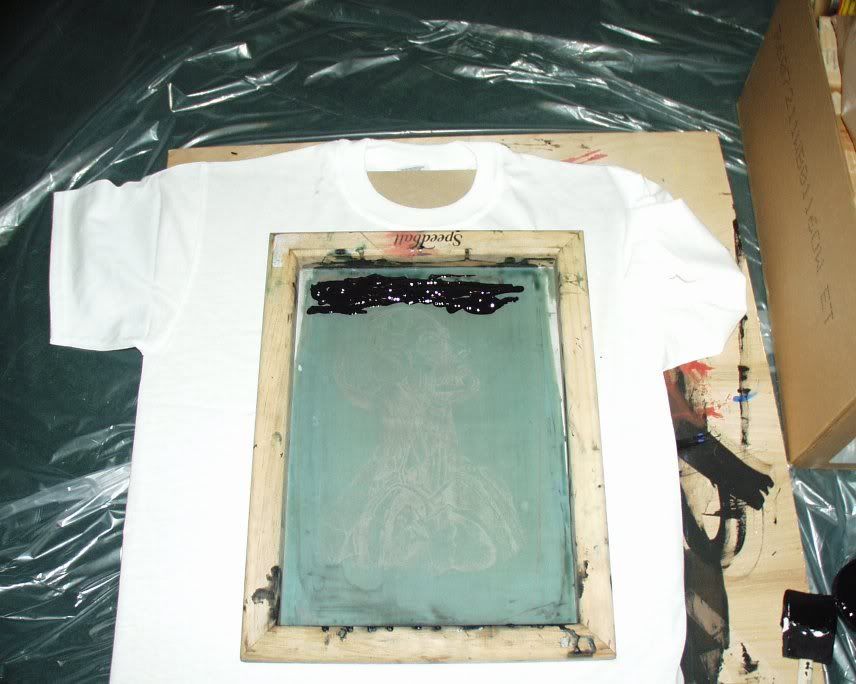
T-shirt printing:
- Prepare the t-shirt iron it. Be sure there is no dust, etc. Put the a plywood/ plastic board etc inside it.
- Get the silkscreen and position it in the t-shirt. The flat surface sound be facing the t-shirt.
- Now, put textile paint in the inner side of the silkscreen.
- Use the sueegee applicator to apply the paint thoroughly.
- Before lifting the silkscreen be sure that there in no more excess paint in the image. Usually excess paint is directed toward the sides /bottom of the silkscreen.
- Upon lifting the screen you will see now the image in the t-shirt. Let it dry. You could use a hair blower to dry it faster.
picture from: stencilrevolution.com by sgt. pepper
good!!
I want to know and to learn about tshirt, mug printing and the like. How can we be in touch with you and how much is the tuition if I would like to learn about it.
Thank you,
Tita laraya
3027079